Sometimes, it’s not possible to PXE-boot your machines to install them using MDT 2010 (because it might be a remote network/VLAN) . Then you have two scenarios that I will cover in this post:
- Scenario 1: A bootable USB that will connect to the Deployment Share over the network and transfer all the files.
- Scenario 2: A bootable USB that will contain all Deployment Share data and install everything from the USB
Are you just looking for booting from USB and doing a normal install of Windows 7/2008 without MDT? Check my other post.
First, in both cases you need to prepare the USB. Insert it and run the following commands against it (make sure you select the correct disk!):
diskpart.exe
list disk
select disk x
clean
create partition primary
select partition 1
active
format fs=ntfs quick
exit
From the Windows 7/2008 DVD, copy the following to the USB:
- bootmgr (file)
- \boot (directory)
Some posts out there argue you also need to run bootsect.exe from the \boot directory of the Windows 7/2008 DVD. Why I don’t know since for me it works anyway:
bootsect.exe /nt60 D: (and even possible /mbr)
Now you’re all set to continue to scenario 1 or 2 depending on what you want to do.
Scenario 1
So you just want to boot using the USB and get all the files over the network from the Deployment Share? Make sure you update the Deployment Share:
On the USB root, create a folder called \sources. Go to the \DeploymentShare\Boot and get either LiteTouchPE_x86.wim or LiteTouchPE_x64.wim depending on what you’re booting on. Copy it to the \sources directory on the USB and rename it to boot.wim.
Scenario 2
So your computer does not have network access to the Deployment Share or is on a slow link so you want to install everything from the USB?
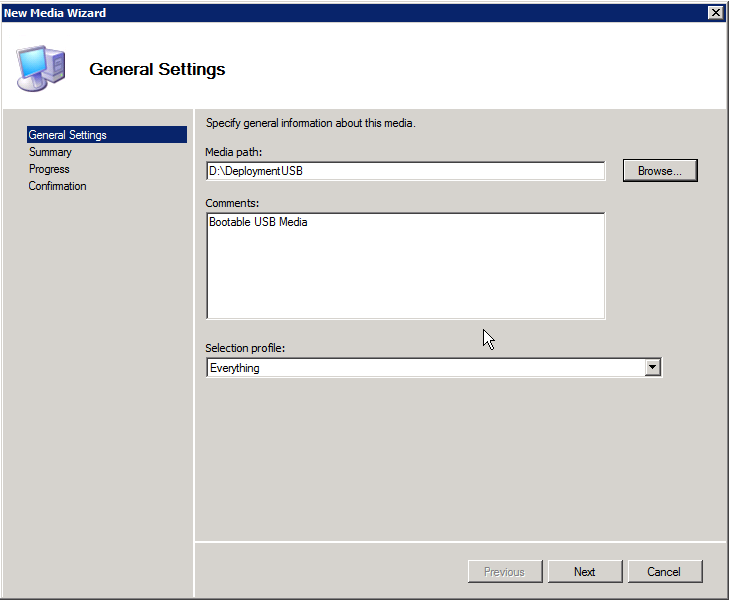
In MDT, right-click Media and choose New Media.
You can specify a temp location on the MDT-server while it generates:
Once created you need to Update Media Content which will actually copy all the files over to that directory.
Then simply copy everything from D:\DeploymentUSB\Content to the root of the USB.
Boot on the USB and it should install everything from the local USB.
If you can’t get the USB to boot, check my other post which includes some known issues.


I have successfully created the offline boot media using MDT 2013 Update 2. I created a bootable usb drive both fat32 and ntfs I even created a boot disk with a boot partition and images partition since my offline media is 15GB. The computer will step through the MDT loading OS processes upon reboot the computer errors with no Operating System found.
Few things to check, Jonathan: Sometimes I forget to check the boot manager and see that it’s not a valid boot option for whatever reason. Sometimes it requires going into the bios, changing nothing, and exiting before it recognizes a new boot device. This is due to newer computers using fast boot and only looking for changes when it’s told to.
UEFI vs Legacy/BIOS. If you image with a legacy image (even if you’re booted in UEFI), your system will not recognize the OS. Likewise, the reverse is true. If you create a UEFI image, but are in legacy mode, it will not see an OS.
I would also check your MDT logs on the thumb drive (or C: if it got that far) for any possible errors in laying down the image. If you can’t boot it, you would either have to remove the hard drive and view it as an external drive to view C: Sometimes you can’t do this for whatever reason (soldered solid state, etc.) and it makes it more difficult, but if online imaging works and the offline doesn’t, I’d start with these steps before pulling any hair out.
Have you remembered to copy your rules from the share to the media?
Looking at option 2…. is there a way to include driver sets as well? I’m imaging a scenario where different server models are deployed — with the correct drivers — using the same USB stick.
diskpart never worked for me
I always use rufus